My 5 Tips for Pokemon GO Festival


I’ve been an avid player of Pokémon GO since 2018 (played it when it was first released in 2016, left for a while, then came back to before Pokémon Sword and Shield were released. Now I play it every day thanks to COVID and anxiety issues). Pokémon GO Festivals started in 2017 as in-person events, but eventually moved to digital events for everyone since 2020 which include various pokémon found in certain biomes, themes and Legendary/Mythical pokémon to catch.

Pokemon GO Johto Tour is happening this Saturday all across the world from 9:00 a.m. to 21:00 p.m. (local time). Here are my top tips for enduring this event, along with future Pokémon GO events.


Tip #1 – Check for Updates!

I personally use both Android (phone) and Apple (tablet) to play Pokemon GO

Whether you’re Apple, Android or don’t care, all mobile devices and alike need updates and they pop up when you least expect it. Take mine for instance – just the other day, I was travelling via bus to get to an important meeting in another town and halfway there, my phone needed an update. No warnings but thankfully I could choose when to update it. 

Most settings on phones and tablet devices (use whichever, I don’t discriminate) allow you to check for updates and choose when to install them. Personally, I would do it a day or two before the event in case something goes wrong.


Tip #2 – Storage is Your Best Friend!

Duplicate pokemon can take up space so get rid of what you don’t need

Pokémon GO does limit the amount of pokemon and items you can hold at any given time (the maximum for pokémon is 5,500 and for items it’s 4,500. This was updated recently). You can buy storage with pokécoins (which you earn by leaving pokémon in gyms or buying them with real money) but it’s always worth checking your storage for duplicate pokémon and/or the amount of items you have. It’s worth stocking up too! Items can be earned by opening gifts from friends, spinning pokéstops and gyms as well as buying them from the shop. Free and discounted-priced items will be available before and on the day of the event.


Tip #3 – Cheese it!

I’m one who often runs out of space

Going off limited space for items, did you know you can go over the limit? However, when you do you cannot open gifts or receive items from spinning pokéstops. The only way to overstock on purpose is by completing tasks (either field or special research tasks) and by completing your weekly research for Research Breakthrough (you do this by completing and turning in a field research task everyday for a week. You are rewarded with pokéballs, items and a pokémon encounter). You can sometimes earn up to 20 items from the Research Breakthrough, so it might be a good idea to wait until the day before or day of the event to turn your research in.


Tip #4 – Comfort is Key in Dressing Best!

These shoes are a no-no!

Having gone to conventions and such, I know that comfort is the most important thing when walking around for hours on end. The weather is another important factor in this. Thanks to technology, we can predict the weather ahead of time (if you’re in the UK like me, this Saturday looks to be good weather – fingers crossed!) so it’s always good to pack what is needed. 

Shoes are just as important, especially when Pokémon GO encourages exercise. I recommend trainers with comfortable soles that do not rub but are also waterproof. This may seem silly but if the weather is bad (like Storm Eunice kind of bad), don’t force yourself to go out! Likewise, if it’s sunny, a hat, sunscreen and sunglasses can go a long way.


Tip #5 – Pack your Bag the Night Before!

At least for Pokemon GO festivals, you don’t have to worry about being at the airport 5 hours early

You will need a bag if you plan on walking around outside for the festival. Here’s a small checklist for things to include:

  • A water bottle
  • Snacks/food
  • A power bank
  • Weather-appropriate clothing/items (such as an umbrella, raincoat, a hat, sunglasses, etc., etc.)
  • Tissues (hay fever season)

Optional items can be a notebook to jot down timings (the festival rotates which pokémon appear during a certain time in different ‘cities’ or biomes, depending on the festival) and a map to plan what areas you want to go to.

I’d also recommend meeting up with friends to make it more fun and to make sure you’re safe. 


Thanks for reading! I hope you enjoyed and hopefully I’ve given you some helpful advice to use for the upcoming Johto Tour and other future Pokemon GO festivals. Until next time!


My Top 5 Tips when Playing Brigitte in Overwatch

Brigitte_portrait

Brigitte is the 27th Hero of Overwatch but the first ‘hybrid’ character. She is also the youngest daughter of Torbjorn Lindholm, engineer and squire to Wilhelm Reinhardt. Despite Torbjorn’s skills in creating weapons, Brigitte preferred armor and defense systems. 

Brigitte_Origin_Story_art_1

Many suspected for Brigitte to continue in her father’s footsteps, however because of her godfather Reinhardt’s tales of his adventures in Overwatch. Despite Overwatch’s fall, Reinhardt refused to go into retirement and continued his quests of justice, Brigitte offered to become his squire. Reinhardt gladly accepted.

During their journeys, Brigitte repaired Reinhardt’s Crusader armor, but soon released that serving as a mechanic was not enough, and so trained to fight and created herself a set of armor. She fought at Reinhardt’s side to protect him, and others.

Brigitte_Concept

Brigitte is a Support hero with a 1 star difficulty.

brigitte-skills


 Tip #1 – Not a Rocket Flail

KaleidoscopicWindingCricket-max-1mb

Brigitte’s main weapon is her Rocket Flail – a melee weapon that can deal up to 35 damage at a 6 m range (and has 2 swings per second, meaning she can deal 70 damage per second). With high damage and long range, it is good to attack a clamp of enemies in one fell swoop. With each hit she deals, she also heals up any allies within in a 20 m radius with Inspire.

Equally, Brigitte is good for 1-vs-1 battles should an enemy stray or solo a point. However, she is susceptible to Turrets, Snipers (due to her larger hit-box because of her Support/Tank hybrid status) and Tanks.


Tip #2 – I will be Your Shield

maxresdefault

Another one of Brigitte’s abilities is her shield – it is smaller than Reinhardt’s (it only really protects her and has 600 HP, compared to Reinhardt’s 2000 HP Barrier Field) but can still block some Ultimates. She is good at protecting single teammates, especially Mercy when she is Resurrecting a fallen teammate. It saves teammates who have been hooked, flashbanged and/or frozen.

When equipping Barrier Shield, she is also able to use a Shield Bash as a ability. This deals 50 damage and stuns enemies at a 6 m range. It can stun enemies using a Ult and be combined with her Rocket Flail and Whip Shot to deal a large amount of damage (approximately 180 damage if timed right and successful). It can also be used to knock enemies off a point and even off cliffs.


Tip #3 – Whip Shot it

brigitte-overwatch-flail-highlight-intro-green-902x507

As previously mentioned, another one of her abilities is the Whip Shot – she throws her Rocket Flail a long distance (up to 20 m) and knocks an enemy away from her. Like the Shield Bash, it can knock enemies off points and cliffs. It can also finish off low-health enemies.

31234996_1483455305089099_1385201453462716416_n

However, Whip Shot does take a few seconds to retract after using it, leaving Brigitte vulnerable, especially against Snipers. A combo to use is: Rocket Flail (2 swings) -> Shield Bash -> Rocket Flail (2 swings) -> Whip Shot (this is especially great to eliminate Tracer).


Tip #4 – Hope you Feel Better Soon!

thumb-ability

Another one of Brigitte’s abilities (she actually has 6 – the most of any Hero) is her Repair Pack. This is used to heal up a teammate (150 health) at a 30 m range, but also give them armor should the ally’s maximum health is filled back up (up to 75 HP armor). However, it only lasts for 5 seconds unless it is destroyed.

Unlike her fellow Support teammates, Brigitte is not to be paired with other Supports, especially Lucio. She is a great substitute for Zenyatta and good for keeping other Healers alive if they are being flanked.


Tip #5 – Rally to Me!

Overwatch-Brigitte-guide-1

Brigitte’s Ultimate ability is Rally – it allows her to move faster and provide all teammates within a 8 m radius with armor (up to 150). This, paired with Inspire, creates the ultimate healing/support push a team may need to get to the point or defend it. 

During her Ult, she can still use her Repair Pack, which could buff a Tank to push a point or a Defense Hero defending the point. She can use her other abilities too, making her a great way to push on the point or defend it herself.


  • You can see Brigitte in Reinhardt’s animated short Honor and Glory here.
  • You can watch her Introduction video here.
  • You can watch Brigitte’s origin story here.

Thanks for reading, hope you enjoyed. Until next week, take care!

My Top Tips when Playing Mercy (2.0) in Overwatch

Mercy_portrait

Mercy AKA Dr. Angela Ziegler, is my main character to play and is equally one of the most played, but also the most nerfed (hence the rewrite of this guide).

Mercy_Concept

Dr. Ziegler is a well know healer who became the Head of Surgery in her homeland of Switzerland who had a huge break through in regards to nanobiology that improved human health immensely. The break through caught the eye of Overwatch, who offered her a position within their organization. At first, she was opposed to the idea due to her parents having died in war but also knew she could help others on a much larger scale.

Reflections_-_Mercy

Dr. Ziegler became the Head of Medical Research, in which she developed the Valkyrie Suit – by giving her the appearance of an angel, she is able to increase her speed and even fly. She stuck with Overwatch – despite her being at odds with her superiors often – until it disbanded. Despite the death of the organization, she continued her work helping those affected by war across the world.

Uprising_Menu_Mercy

Mercy is a 1 star Support Hero.

mercy


Tip #1 – Only Use the Pistol When You Need to

Mercy_Overwatch_008

Mercy has 2 weapons – her Caduceus Staff and her Caduceus Blaster. You’ll be using the Staff mostly but the Blaster is handy in 1 vs 1 situations. Granted, it has only 20 rounds and only does 20 damage per projectile but it can headshot and also pick off unaware enemies, such as a sniping Widowmaker or a sneaky Sombra.

Mercy is not known for her high attack plays, so don’t go charging in with the Blaster – you will die quickly once the enemy knows your position (which the Blaster doesn’t necessarily give away). It’s also good at destroying the small stuff, such as Widowmaker’s Venom Mine or Symmetra’s Turrets.


Tip #2 – Healing is Good, but so is Boosting

Mercy_Overwatch_002

Mercy’s Caduceus Staff has 2 abilities – the ability to heal and the ability to boost. Granted, this can only be used only  on one person at one  time and you’ll mainly be healing everyone, but don’t forget about boosting. It boosts your teammates’ primary attack, but can be used on Ults (apart from Junkrat’s RIP-Tire, Torbjorn’s Turrent or Symmetra’s Shield Generator or Teleporter). Plan it right, and you could get a long assist kill list!

If I choose Mercy at the beginning of a match, I tend to pick one character to boost at the beginning to get those few first kills before my teammates begin to die. I often choose a Sniper or a Tank. Mercy’s boosting powers are also good when you have a shield and snipe combination – such as Bastion and Reinhardt or Orisa and Widowmaker.

It’s also worth noting that he beam emitting from Mercy’s Caduceus Staff will stay connected, even if you can’t see your teammate. This is good for hiding around corners while healing or boosting and staying out of sight of enemies as Mercy is easily picked off by snipers. This is also good with the shield-and-snipe-combination that I mentioned before.


Tip #3 – Guardian Angel isn’t Just a Title

maxresdefault-30

One of Mercy’s other abilities is the Guardian Angel which allows her to quickly travel with a low cooldown rate.  You can only really use it when your teammates are in Mercy’s sights but it is also useful when Mercy is falling off a map or enters an area where most or all enemy players are. Much like me spamming spacebar when playing Symmetra and attacking another player, I will often spam the Guardian Angel when I’m in a tight spot.

You can still use the Guardian Angel when using the Caduceus Staff and healing/boosting a teammate – even if you hit a physical obstacle or your teammate is out of sight.


Tip #4 – This is Not your Time

Mercy_Overwatch_001

Mercy 0.1’s Ult was her Resurrect ability – the ability to bring 1 or more allies back to life. Naturally, this was good to use when a large amount of teammates had been wiped out (like with a Ult). However, this had now been changed to a normal ability.

Despite this, it still isn’t quite the same – it has now been changed to a single person resurrection (it used to be 2, but it changed…again) with a cool down of 30 seconds. It isn’t instant either – it takes about 2.25 seconds to cast, meaning Mercy can be an easy target when doing so. The amount of times I’ve been sniped when trying to resurrect a teammate who’s just died – and even if you don’t use it, the cool down still happens! Just think carefully when using it.


Tip #5 – I Will Watch Over You!

On September 19th last year, Mercy’s Ultimate ability was changed – no longer could she resurrect multiple dead allies – now her Ult is Valkyrie. Along with a changed icon, it is a self-buff ability that allows Mercy to fly (not like Pharah – she actually stays in the air for the full 15 seconds); have a faster movement speed; regenerate health (which will be uninterrupted, even when she takes damage); allows her Caduceus Staff longer range (i.e. if she heals or boosts, she can heal multiple targets at one time) and her Caduceus Blaster is given infinite ammo and higher damage, turning her into ‘Battle Mercy’.

Personally, I’m more of a Healing Mercy so I often use Valkyrie in tight spots – when more than one of my allies is low on health. Again – like Resurrect – it’s about timing, rather than just pulling off an Ult for the sake of it (trust me, there have been times when I haven’t used the Ult simply because I didn’t want to waste it at the wrong time).


  • You can watch previews some of Mercy’s abilities, such as Guardian Angel, Caduceus Staff and Angelic Descent in different videos from the links provided.
  • You can read the comic Uprising here, that gives a bit more background to Mercy (and ties in with the event) here.

Thanks for reading, hope you enjoyed! I’VE FINALLY FINISHED MY OVERWATCH CHARACTER GUIDES – HOORAY! Back to usual content. Stay tuned for next week!

All my skins for Mercy

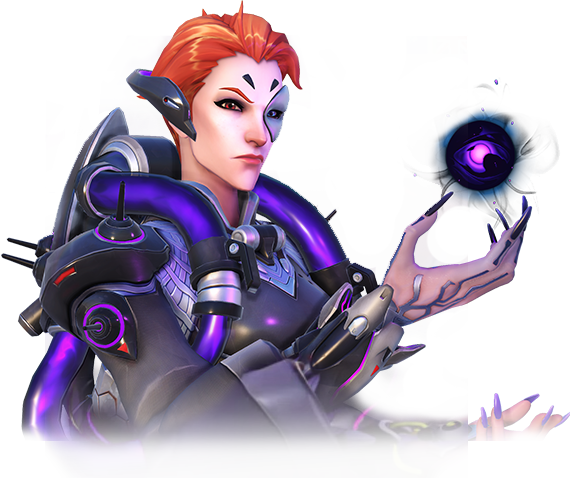
My Top 5 Tips when Playing Moira in Overwatch

Moira_portrait2

Moira O’Deorain is the latest Hero to join Overwatch. Before the Omnic Crisis she published a paper in regards to altering DNA on a cellular level. While it could have been a scientific breakthrough, it was feared for its controversy and actually damaged her reputation. It did not help that other scientists could not produce similar results as she did in regards to experiments – it was even rumoured that Talon was the one helping her behind the scenes.

Moira

She received a lifetime opportunity to join Blackwatch, however her employment was kept a secret. She developed new technologies and weapons for them throughout the years until Overwatch disbanded. She then joined a scientific collective in Oasis and even became a minister. Now, she develops things for herself, hoping to find the secret in rewriting the fundamental  building blocks of life, with Talon by her side.

MoiraReyes

Moira is a Support Hero with a 2 star difficulty rating.

fveywjmrxvshsb9uzam4


Tip #1 – Bounce

uwoyyxfatfquaup5wtif

One of Moira’s abilities is her Biotic Orb in which she can choose to heal allies or deal damage to enemies through an orb of energy that can travel long distances (around 30 m) and even pass through some objects. It can heal 75 HP per second (maximum of 300) or deal 50 damage per second (maximum of 200). Naturally, these can be used to heal allies at long distances or damage far away enemies. This is important to remember as it can help with 1v1 fights, e.g. use a Healing Orb while fighting a Tank 1 on 1, otherwise Moira will not survive (she only has 200 HP).

Whether a player chooses to heal or debuff, it is important to remember that Moira’s Orbs do bounce, so throwing them in enclosed spaces can be beneficial. If using the Damage Orb, it will be hard to dodge/avoid them but if using a Healing orb, it will maximise AOE. In either case, it can effect multiple targets at one time, so it depends on the situation.


Tip #2 – One Hand Gives…

Overwatch_Moira_009_png_jpgcopy

Moira’s primary weapon is her Biotic Grasp and – once again – like other Heroes, it has 2 different firing modes. Her first one is Regeneration – using her left hand, she can release healing energy at a short distance (up to 15 m). It can heal up to 80 HP per second, however due to the tanks of energy Moira carries on her back, it has a limited supply unless it is left to recharge (which can take up to 45 seconds) or you use Decay (we’ll talk about that in a minute).

However, her healing does not stop when it hits an ally, meaning you can heal multiple targets in tight places. Using a Healing Orb can maximise healing to Moira’s fullest potential.


Tip #3 – …and the Other takes Away

Overwatch_Moira_007

Moira’s secondary mode is Decay –  this is a beam that latches onto an enemy and drains their life, while healing Moira and replenishing her biotic energy (this recharges Moira’s Regeneration ability). This is a long range attack (it can reach an enemy up to 20 m) and deal 50 damage per second (and heal Moira for 33 per second).

Decay has the same reach of Chain Hook, meaning it can reach enemies from far away. However, if an enemy has a ability to disappear or block, such as Blink or Barrier Shield, it will stop sapping from an enemy.


Tip #4 – Fade Away

overwatch_moira_blizzcon-18

Moira’s last ability is Fade – similar to Wraith Form – it allows Moira to disappear and move away while being invulnerable, however she cannot use any of her other abilities while doing so. It lasts less than 1 second and has a movement speed of 18.75 m/s.

However, with Fade, enemies cannot see a trail to where Moira is moving to, meaning it is best to use when escaping a 1-on-1 battle when she is low on health. She also cannot be harmed during Fade, so it can used to avoid Ults such as RIP-Tire, Self-Destruct, Death Blossom and more. Due to a bug, she can also fade through enemies (and shields).


Tip #5 – Surrender to my Will!

xq5yl7p60z93bpnefonf

Moira’s Ultimate ability is Coalscence – a large energy beam that heals allies and drains the health of enemies if they pass through it. The beam is able to pass through barriers and allows Moira to move quickly (9 m/s movement speed). It can heal 140 HP per second and damage enemies for 70 HP per second at a 30 m range, but only lasts 8 seconds.

Her Ultimate is best used as team support (like most Support Hero Ults), so it best used when mass healing is needed rather than dealing a large amount of damage (but it does help). Before casting Coalscence, throw out Heal Orbs to sustain the duration of the Ult as well as targeting as many teammates/enemies as possible, e.g. if you are escorting the payload, it is best to move side to side to heal teammates as well as damage enemies.


  • You can watch Moira’s Introduction video here.
  • You can watch Moira’s Origin video here.

Thanks for reading, hope you enjoyed! Next week will be the LAST Overwatch Character Guide (a re-work of Mercy), so until then, take care!


My Top 5 Tips when Playing Zenyatta in Overwatch

Zenyatta_portrait

Tekhartha Zenyatta joined a group of outcast of omnics many years after the Omnic Crisis and establish a monastery in the Himalayas, where the group lived in peace and spiritual teachings.

Halo

Tekhartha Mondatta, who was assassinated by Widowmaker

After years of meditation, one of the omnics Tekhartha Mondatta, decided that the wounds the Omnic Crisis planted on the world needed to be healed, hoping to bring humans and robots together once more. They sent their message across the world, where it was accepted by millions.

Zenyatta_Concept

However, one the monks – Zenyatta – felt that the wounds were too deep to repair and instead left the monastery and travelled the globe. It is said that those who cross his path are never the same again.

Zenyatta-Support-Abilities-Overwatch

Zenyatta is a Support Hero with a 3 star rating.


Tip #1 – A Chance to Focus, but not too Much

Zenyatta_Overwatch_003

Zenyatta’s primary weapon is his orbs that are able to switch to either help a ally (healing) or amplify an enemy’s damage take (debuff). Understandably, this is good to help those in need and aid those in defeating the enemy; unfortunately, Zenyatta can only has one target at a time, e.g. he can only heal one ally at one time (until the orb is returned or the target is changed) as well as target one enemy at one time. Therefore in terms of healing, it is good not to focus on just one player (even though it is very tempting with a Tank).

With both the Harmony and Discord orbs, Zenyatta must have a line of sight for his targets, meaning they can be blocked by walls or shields.


Tip #2 – Don’t Underestimate Support

Zenyatta_-_XBox

As Zenyatta is a Support hero, he is often underestimated, when in actual fact he is a deadly threat. Zenyatta has a total of 20 orbs that he can use before reloading, but even then it only takes 2 seconds. Each orb can cause up to 46 damage, in which he can fire 2.5 orbs per second – meaning he can deal around 115 damage per second. And let’s not forget that the orbs can headshot and travel 60 meters in 1 second.


Tip #3 – It’s all about Numbers

As mentioned, it is good for a Zenyatta player not to focus on just one Hero as he has no real ability of healing as a mass group (apart from his Ultimate, but we’ll get onto that later). This means Zenyatta is also good to back up other Supports. It rapidly heals (30 HP per second) and because Zenyatta does not need to be accurate with his shots (due to his line of sight abilities), he can also aid Supports who are far away and focusing on just one teammate. This works best for Mercy as she too can only heal/damage buff one player at a time (unless she uses her Ultimate as well).


Tip #4 – No Spread Please

Zenyatta_Overwatch_006

As with most Overwatch Heroes, Zenyatta has 2 different firing types of his primary weapon: Singular Orb and Orb Volley. Orb Volley allows Zenyatta to charge his orbs around him (up to 5 for the maximum shot) and fire them all at one time. Again, this can make Zenyatta quite deadly – he can charge 5 orbs within 3 seconds and they can do a maximum of 230 HP (bodyshot). Oh, they can also headshot.

It is advised that single shots of orbs being spammed is better than taking time to charge up multiple shots, however Orb Volley can catch enemies by surprise if charged while going around a corner. Just simply charge them and slowly move around a corner, hoping catching an enemy off guard. Zenyatta has no footsteps either, which will work to your advantage.


Tip #5 – Tranquility Embraces You

Zenyadda

Zenyatta’s Ultimate ability is Transcendence – this allows Zenyatta to enter a high existence and despite not being able to use any of his abilities, he can move faster, becomes immune to damage and heal teammates within a 10 m radius (300 healing per second).

It is advised that players should not use Transcendence when cornered, granted it can help with escaping. It is good to use if players are caught in a enemy’s Ultimate (such as Gravity Surge) or fighting on a choke point, such as capturing points or pushing the payload those last few meters.


  • You can watch an overview of Zenyatta’s abilities here.
  • You can watch some gameplay of Zenyatta here.

Thanks for reading, hope you enjoyed! Let me know if I missed anything. We’re finally at the end (although I may rewrite Mercy’s Character Guide as she has been changed so much) as we only have one left – the lastest Hero, Moira. Until then, take care!

My set up for Zenyatta

My Top 5 Tips when Playing Zarya in Overwatch

Zarya_portrait

Zarya – real name Aleksandra Zaryanova – is known one of the world’s strongest women (she once managed to left 512 kg). She grew up in a small Russian village but was surrounded by the post Ominc war where much of the Russian forces had fought the robots. As Zarya grew up, she focused on weightlifting and bodybuilding, slowly becoming a sports star, eventually entering in championships across the globe. Sadly, on the eve of an important tournament, a another attack commenced in Russia. She dropped out and threw herself onto the front lines to protect those she loves.

Zarya_Concept

Zarya is a Tank Hero with a 3 star difficulty rating.

Zarya-Tank-Abilities-Overwatch


Tip #1 – Zarya Used Energy Beam

Zarya’s weapon is her Particle Cannon –  a huge cannon that, like most other weapons in Overwatch, has 2 different types of fire power. Her primary one is the Energy Beam – a linear beam that can deal up to 190 damage per second with a 15 m range. Her secondary fire is the Explosive Charge – an arching splash projectile of energy that can deal up to 92 damage per shot with a 3 m splash radius (meaning it can self-harm).

Understandably, Energy Beam is best used on enemies at short distance but also for a 1-on-1 battles as it can only focuses on 1 enemy at one time, while the Explosive Charge is  better at long distance to deal more damage on multiple targets. Players can maximize her DPS by using an Explosive Charge then using melee after getting closer to the enemy.


Tip #2 – I Will Shield Me

ZaryaSS3

One of Zarya’s abilities is the Particle Barrier – a self-emitted barrier that only lasts 2 seconds or until it is destroyed (it has 200 HP) and as you can imagine, it shields Zarya from any oncoming damage. This is extremely useful against turrets as they do not stop shooting her when the shield is activated, meaning she can ‘pop’ back and forth behind a wall or another hiding spot to slowly but surely destroy a turret.


Tip #3 – I Will Shield You

ZaryaSS4

Another one of Zarya’s abilities is her Projected Barrier – it is the same as her Particle Barrier, only she can shield one of her teammates from a 30 m range. It is worth noting – along with the Particle Barrier – that deploying the shield is all about timing. The shield is good against Ultimates such as Self-Destruct; Pulse Bomb and RIP-Tire and even Deadeye. It can be used to save a teammate in a close combat fight and lower health teammates, such as Mercy in tricky situations.


Tip #4 – Energy is the Key to Victory

zarya-charged-particle-cannon

Zarya has a passive ability (i.e. a ability that the player does not need to press a button for as it happens automatically) simply called Energy. It allows Zarya to increase her Particle Cannon by blocking damage. This is particular useful as half of Zarya’s total health (400 HP) is made up by her personal shield – once it is gone, it is very easy to take her out. This makes her very durable as very 3 seconds she does not take damage, she regains her shield, which will regenerate to its maximum. It also means she can physically block teammates if need be.


Tip #5 – Feel the Power of Attraction

ZaryaSS5

Zarya’s Ultimate ability is Gravational Surge – a gravity bomb that attracts all enemies within a 8 m radius to a particular point while dealing 22 damage. As well as grouping this Ult with others, it is also a good idea for the Zarya player to spam Explosive Charges to deal extra damage, however it only lasts for 4 seconds, so time is of the essence. It is also worth noting that if a enemy character is within radius, they can be trapped from the other side of walls.


  • You can watch a ability overview video here.
  • You can around 10 minutes of Zarya gameplay here.

That’s it for this week, hope you enjoyed. As always, let me know if I missed out any good tips and until next time, take care.

My set up for Zarya

My Top 5 Tips when Playing Roadhog in Overwatch

Roadhog_portrait_m

Roadhog – also known as Mako Rutledge – has a similar back story to his companion Junkrat. After the Omnic Crisis, the Australian government created an omnium but Roadhog joined the Australian Liberal Front to stop it. The result ended in a post-apocalyptic wasteland that inhabited the ruthless and less than humane survivors. Roadhog donned a mask to survive, along with his hook chain and chopper. On his travels, he met Jamison Fawkes who was looking for a bodyguard. The two of them teamed up, causing mayhem and death wherever they went.

Roadhog_Concept

Roadhog is a Tank Hero with a one star difficulty.

Roadhog-Tank-Abilities-Overwatch


Tip #1 – Aggressive or Passive?

Roadhog_SS_3

As previously stated, Roadhog is a Tank hero, meaning he can take a lot of damage and deal a large amount too. Tanks in Overwatch have some sort of shield ability to make them more stable (and somewhat fair, depends on your point of view), such as D.Va’s Shield Matrix and Winston’s Barrier Projector. Roadhog is the only Tank hero who does not have a physical shield he can use (he has another ability that works similarly, but we’ll get onto that later).

This means this can aid the enemy team in getting their Ultimate abilities charged faster as physical hits build up the Ultimate charge while shield hits do not. Therefore, Roadhog should not really be used as a meat shield but played much more aggressively compared to other Tank heroes. He is less team focused, which works in the player’s favour.


Tip #2 – Hook, Link and Sinker

Roadhog_SS_1

Roadhog’s secondary weapon is his Chain Hook, which is pretty self-explanatory  – he can throw out a chain from his hand that has a hook on the end of it, allowing him to bring enemies close to him. Naturally, it is a good combo to hook an enemy then shoot them with Roadhog’s primary weapon – his Scrap Gun. Tracking will work in your favour too.

The Chain Hook can used to pull enemies off bottomless pits, such as the Well in Ilois, as well drag them when Roadhog himself has fallen off the map (unless it is a character with a movement ability, such as D.Va, Lucio, Genji, Hanzo, Mercy, Pharah and Tracer), resulting in certain death. It is also worth noting that Roadhog’s Chain Hook can interrupt enemies’ Ultimates, such as Pharah’s Barrage, well as save other teammates, e.g. he can hook Junkrat’s RIP-Tire or D.Va’s Self-Destruct, although it may result in the player sacrificing themselves (there is a great video I saw where a Roadhog player hooked not 1, but 2 of D.Va’s Self-Destructs in King’s Row).


Tip #3 – Shrapnel, Naprapnel

junk

As mentioned, Roadhog’s primary weapon is his Scrap Gun – a fire with 5 shots of shrapnel that be fired in either a spread or as a short-range attack (Shrapnel Blast and Shrapnel Ball). Now, it sounds like Roadhog doesn’t have much ammo, but he reloads quickly (1.5 seconds) and can deal heavy damage (a maximum of 150 damage as a bodyshot with both fires). Both fire modes can headshot and are subject to falloff damage.

To maximize damage, it is recommended to use the primary fire first, hook the enemy, then shoot again (either primary or secondary is fine, but I personally recommend secondary as I am not an expert Roadhog player). The Chain Hook can deal 30 damage, meaning that if every shot is perfect, you could deal 330 damage, which is good against lower-health enemies, especially Supports.


Tip #4 – Take a Breather

sCeEbNP

Another one of Roadhog’s abilities is Take a Breather – a container that Roadhog breathes in to regain health (this is what I meant earlier about Roadhog not having a physical shield but a way of protecting himself/self-healing).

Roadhog can regain 300 health and it gives his a 50% damage resistance within a second, however it does have a long cool down (8 seconds). Because of this, use it sparingly and also watch out for enemies as it can be interrupted by other player’s abilities, such as Ana‘s Sleep Dart or McCree‘s Flashbang, so it is a good idea to flee a situation if you have low health and get into cover.


Tip #5 – Hog Wild

Roadhog’s Ultimate is Whole Hog – using the Scrap Fire, he rapidly fires in one direction. This Ultimate is fatal – just one shot could cause up to 110 damage, which is a maximum of 4928 damage of bodyshots. It only lasts 6 seconds but can headshot, making it useful to use to blocked off areas or tight rooms, such as in Hollywood. Much like the Chain Hoook, it can interrupt other Ultimates, such as Reinhardt‘s Earthshatter and can also knock players off cliffs and the such. However, Roadhog’s movement speed is reduced, making him a easy target for snipers.


  • Here is a overview of Roadhog’s abilities.
  • Here is a video introducing Roadhog and Junkrat.
  • Here is the short animation, The Plan: Junkertown.
  • You can read the comic “Going Legit” here.
  • Here is another animated short called A Moment in Crime Special Report: The Junkers.

Thanks for writing, hope you enjoyed! Please let me know if I missed any other top tricks. Until next time, take care!

My set up for Roadhog

My Top 5 Tips When Playing Pharah in Overwatch

Pharah_portrait

Pharah – real name Fareeha Amari – is best known as the daughter of Ana Amari, one of Overwatch’s most known captains. Naturally, she wished to follow in her mother’s footsteps to serve in Overwatch, but before she even had the opportunity, Overwatch was disbanded. Instead, she joined the Helix Security International – an armed protection service – but still has a heavy sense to carry out justice.

Pharah_Concept

Pharah is an Offense Hero with a 1 star difficulty rating.

Pharah-Offense-Abilities-Overwatch


Tip #1 – Shot Down

Pharah’s primary weapon is her Rocket Launcher – it launches rockets in a linear fashion that deals a large radius damage (20 – 80 splash damage, 120 with a direct hit). She only has 6 rounds, but it takes 1 second to reload, meaning she can spam rockets. This is extremely effective to use on points themselves (either Attacking or Defending), as enemies will make sure they avoid any hits by fleeing the area (especially lower-health heroes, such as Supports, so target them first).

Be careful when spamming rockets though – they can inflict self-damage (up to 40 damage) and knock Pharah back. Be wary of Genji as well – he can easily use Deflect and send the rockets back.


Tip #2 – Jumping into the Sky

Origins_SecurityChiefPharah_001

One of Pharah’s abilities is the Jump Jet – Pharah’s suit is installed with thrusters, allowing her to propel into the air. This is best used to escape an enemy’s line of sight or give her a height advantage. Combining this with her rockets can be a great advantage.

However, be careful not to spam Jump Jet too much as it means Pharah will no longer have a means of escape and can be picked off easily from a Hero who has a height advantage.


Tip #3 – The Knockback Effect

Another one of Pharah’s abilities is her Concussive Blast (but not similar to Junkrat’s Concussive Mine). It is a rocket that Pharah fires from her wrist that also travels in a linear fashion that knocks enemies back within a 8m radius.

Depending on what kind of player you are, the Concussive Blast can be used best in 2 different ways. The first is to knock enemies off the map (it works wonders on Eichenwalde’s Bridge before the last payload checkpoint), so use it when they are close to an edge and clamped together (but some Heroes can save themselves with their own abilities, such as D.Va and Mercy). The second way to use it is to save other teammates when they are in a pinch and being cornered by the enemy. And don’t worry, it will not affect your teammates, so don’t worry about accidentally knocking them off the map.


Tip #4 – Speed is Not on Your Side

Pharah_Overwatch_003

Pharah is an extremely slow character – even though she has Hover Jets, they only have a 2 second duration, meaning Pharah can hover for a certain amount of time before her fuel runs out. Be wary of Heroes that can predict movements (such as good snipers) and have a height advantage, such as Doomfist.


Tip #5 – Death from Above

Pharah_Anubis

Pharah’s Ultimate ability is her Rocket Barrage – a rapid fire of rockets that can destroy groups of enemies. It has high damage (around 40 damage per rocket with a max of 3600 damage), meaning that direct hits can be fatal (30 rockets are fire per second in a duration of 3 seconds, meaning you’ll have to avoid nearly a 100 rockets in one area).

Her ultimate is best used a crowd control, so pairing it up with Gravational Surge (Zarya); Halt (Orisa) or Blizzard (Mei) is a great method to stop or eliminate enemies on the point. It is also worth pointing out that standing on a moving piece of the environment, such as the floating pads in Volskaya Industries) will allow Rocket Barrage to spread out more. Be wary of where you are firing rockets as Pharah can end up damaging or even killing herself by accident, or her Ultimate finishing abruptly from being killed by a Hero with good predicting skills and/or height advantages.


  • You can watch a Pharah Gameplay Overview video here.
  • You can watch a Pharah Abilities Overview video here.

Thanks for reading, hope you enjoyed! Let me know if I missed any good tips. Until next time, take care!

My set up for Pharah

Don’t forget that Overwatch’s 2nd Winter Wonderland Event is live now until January 1st – get as many of the over 50 items and play the new mode as soon as you can!

overwatch-winter-wonderland

My Top 5 Tips When Playing Orisa in Overwatch

Orisa_portrait

Orisa is a robot created by Eifi Oladele – a child prodigy with gifts in robotics and engineering.  After Doomfist’s attack on the Numbani’s Adawe Airport, many parts of the OR15 Defence Bots were left behind.

Orisa-concept

Eifi recovered them, and began to build a new robot – a robot that would become the ‘new hero and protector of Numbani’. She added modifications when needed and added a personality core, resulting in Orisa.

Orisa_and_efi

Orisa is a Tank hero with a 2 star difficulty.

1386463


Tip #1 – Never be Alone

maxresdefault

As with most Tanks (if not all), Orisa should never Attack or Defend by herself. Reliable healers, such as Mercy or Lucio, should stick with her at all times. That way, she can still defend her teammate(s) and can stay in the same spot if she is healed continuously.

Again, with Tanks, Reaper is a very good counter against Orisa, as well as snipers such as Hanzo or Widowmaker due to her size and hitboxes.


Tip #2 – Spread Out

Orisa_SS1

Orisa’s primary weapon is her Fusion Driver that consists of 150 ammo, meaning she can fire continuously for 12 seconds. To balance this, Orisa also has the slowest reload for any Overwatch character (so far) of around 3 seconds.

Because of her shooting abilities, it is wise to spread Orisa’s shots across the environment, rather than just one place. Reload sparingly and make the most out of her bullets. The melee attack at the right time will allow Orisa to reload too.


Tip #3 – Your Safety is my Primary Concern

Another one of Orisa’s abilities is her Protective Barrier – a 900 HP shield that can be fired in a projectile fashion, similar to Widomaker’s Venom Mine. It is probably her most essential ability as it is useful for both Attacking and Defending. It does have a 8 second cool down, meaning that as soon as it’s on the ground, it can be felt for a while before being repositioned. It can be used to protect teammates far away due to it’s large reach and is best used around most – if not all – teammates backing Orisa up.

orisa-immovable-object

Pairing this with Orisa’s Fortify ability makes it hard for Orisa to move, therefore cannot be moved by Lucio’s Soundwave, along with:

  • Flashbang (McCree)
  • Chainhook & Whole Hog‘s knockback (Roadhog)
  • Sleep Dart (Ana)
  • Concussive Blast (Pharah)
  • Boosters (D.Va)
  • Halt! (enemy Orisa)
  • Jump Pack & Primal Rage‘s knockback (Winston)
  • Concussion Mine & Steep Trap (Junkrat)
  • Charge & Earthshatter (Reinhardt)
  • Any firing from the Endothermic Blaster & Blizzard (Mei)
  • Gravition Surge (Zarya)

Tip #4 – Stop Right There!

1386441

Orisa’s last ability is Halt! – a beam that can pull enemies into one space once donated up to 20m. It is partially large, therefore can be used to pull people into a AoE or off edges, such as cliffs.

It can be detonated at any time and – if timed precisely – can be used for an environmental kill (Volskaya Industries is a good map to do this on).


Tip #5 – Cease Your Resistance!

Orisa’s Ultimate Ability is the Supercharger – a device that increases all surrounding teammates damage by 50% within a 25m radius. It lasts around 16 seconds, by can be destroyed by enemies or hacked by Sombra.

The Supercharger is best used when escorting the payload and actually placed on the payload itself. This way, it can be a moving fortress and sticks all teammates in one place – having a Reinhardt, Bastion and/or Mercy gives you a great advantage, as well as protecting it with Orisa’s Protective Barrier.


Thanks for reading, hope you enjoyed! Let me know if I’ve missed any other good Orisa tips. Until next time, take care!

My set up for Orisa

My Top Five Tips When Playing Lúcio in Overwatch

Lucio_portrait

Lúcio (Correia dos Santos) is a international musician that uses his music as a weapon as well as a force for good.

Lucio_Concept

Lúcio grew up in Rio de Janeiro, which was struck into poverty after the Omnic Crisis. In his sorrow for his country and community, he created music and became a street performer. Sure enough, Vishkar Corporation sought to become the world’s saviour, but instead exploited people into a cheap labour force, enforced curfews and used lawless behaviour. Lúcio soon had enough, broke into Vishkar and stole their technology. This soon became his tool to drive them out, making him an overnight star. He used his popularity as a positive social movement.

SynAud_Cover

Lúcio is a 2 star Support Hero.

Lucio-Support-Abilities-Overwatch


Tip #1 – Boop!

Overwatch-Guide-Lucio-02

Lúcio’s main weapon is the Sonic Amplifier – this allows the player to either heal or boost the speed of any teammates within a raidus highlighted (either yellow/gold or green, depending of what buff he is using).

maxresdefault

And – as mentioned on many of this Character Tip Guides – the Sonic Amplifier has two different types of fire. The first being Sonic Projectiles – they deal little damage (4 – 20 damage, max of 80 with a bodyshot) but is good to finish off withered down enemies.The secondary fire – Soundwave – produces a shot of soundwave energy that can knock enemies back. This, naturally, is a huge advantage on corners, chokepoints and ledges that insta-kill enemies by making them fall off. Maps that this advantage should be used on are:

  • Ilois‘s Lighthouse
  • Ilois’s Well
  • Nepal‘s Sanctum
  • Lijiang Tower‘s Night Market
  • Lijiang Tower’s Garden
  • Oasis‘s Gardens
  • Eichenwalde‘s bridge
  • Route 66 (before the last checkpoint)

Tip #2 – Crossfade: Speed Boost

maxresdefault (1)

As mentioned previously, Lúcio’s Sonic Amplifier has 2 buffs – healing and speed. The Speed Boost increases teammates speed by 30% within a 10 m radius for less than 1 second (0.5 to be precise).

The Speed Boost the default mode whenever playing Lúcio for the first time during the match and/or respawning. This is essential for Control Maps (but also good for Defense and Attack) as Lúcio can speed up all teammates (so long as they are in his radius) to get back to the point quickly, especially teamed up with Amp It Up (we’ll talk about that in a minute). Naturally, this is also good to help escape enemies.


Tip #3 – Crossfade: Heal Up

Lucio3

Lúcio’s other buff is a radius of healing (16.25 HP per second on teammates while 13 HP per second on self). While his healing is not as good as Mercy‘s or Zenyatta‘s, he can heal more teammates at one time than other supports.

Healing radius is better for Defense maps, making Lúcio an all-around hero. Switching between healing and speed allows for a fast, on-pace healing radius that can benefit all teammates.


Tip #4 – Amp it Up!

Another one of Lúcio’s abilities is Amp It Up – this gives a boost to either Lúcio’s healing or speed boost. Unlike either of these abilities, it does have a cooldown (12 seconds) and lasts for 3 seconds, meaning it should be used wisely.

If you choose the speed boost, it increases speed movement by 70%, meaning it is best used after respawning (and waiting for teammates if most have died) to get back to the fight faster than usual (mainly benefiting Control and Attack points).

If you choose healing, it heals 46. 8 HP per second (and 35 HP on self) meaning it is best not to waste it on just one teammate but rather most (or all if possible), benefiting Defense points.


Tip #5 – Let’s Break it Down!

Lúcio’s Ultimate ability is the Sound Barrier – within a 30 m radius, Lúcio can provide a personal shield to a teammate, giving them a +500 temporary shield. This works best when all teammates are with you either pushing to escort the payload on Attack, or protecting the point in Defense. It can protect most heroes from most Ultimates, such as Junkrat‘s RIP-Tire or Soldier: 76‘s Tactial Visor, but not all that deal heavy damage at one time, such as D.Va‘s Self-Destruct.

Another good tactic is to pair healing with Amp it Up either before or after (depending on how damaged your team is) to make it harder for the enemy team.


  • You can watch Lúcio’s introduction video here.
  • You can watch an overview of Lúcio’s abilities here.
  • You can click here and here to listen to 2 tracks from Lúcio’s album (that are also used for the healing and boosting song, respectively).

My set up for Lúcio